Other parts: Part II, Part III
0. The entire process of planet creation is based on three main principles.
Firstly, procedural generation as a random process of the planet’s data generation, but with deterministic parameters defined in the planet’s configuration file. This allows the wide range of the planet customization while maintaining the random appearance of a planetary world.
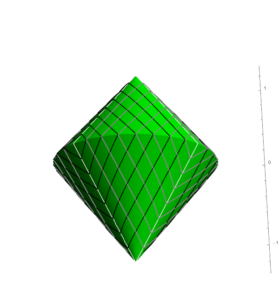
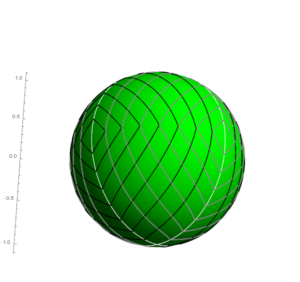
Secondly, the approximation of the planet sphere with two round cones connected by the bases. The planet’s relief built on the twin cones in the end will be mapped onto the planet sphere. Depending on the type of a mapping selected, areas with unacceptable distortions may be placed in the ocean area.
Thirdly, the principle of two-level generation: we start with creation of the first approximation of the planet’s relief, then continue with placing of rivers and other special objects*, and finally the planet’s relief is created.
An example of the twin cones mapping to the planet sphere.
 |
 |
1. Before everything else, we make a bitmap (global or base mesh), which is the first approximation to the planet’s relief. The bitmap points are nodes of the so-called global lattice. The bitmap size is set by the first parameter gn of the planet’s signature.
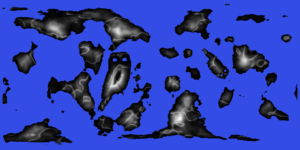
Although there are rectangular bitmap images here, it is actually a rectangular view of the two connected cones. Therefore, points of the global mesh close to the top or bottom edges are visible as horizontal dashes.
The creation of the bitmap involves combinations of layers, which are either bitmaps themselves, or operations on bitmaps. Pictures of fBm noise, images of functions defined on a sphere, or figures defined by arrays of coordinates from a JSON file can be used as layers. See an example of the bitmap below.
In addition, other operations can be performed on such a bitmap. For example, there is operations to eliminate some local minima (fewer lakes), or to apply a function on points of continents, which is parameterized by the size of each continent (eatherization).
Here and below, by the continent we mean any connected region located above sea level and separated from other such regions. Therefore, the size of a continent can be very different.
2. Here we move on to the concept of the local lattice; it is a lattice that is built between the points of the base lattice. Each four close points of the global lattice are located at the vertices of a rhombus located on the twin cones. Since when the cones are subsequently mapped onto the sphere, the shape of the rhombuses becomes distorted and, generally speaking, becomes far from a regular rhombus, such a figure received the special name romb. An internal lattice of nodes is created inside each romb. All such rombs form a tile covering of the twin cones, and their mapping images cover the planet sphere.
The collection of values on the local lattice nodes is called the local mesh; depending on the context, this term can refer to either a single romb or the entire space of the cones. The linear size of the local lattice is determined by the second parameter ln of the planet’s signature and is equal to 2ln.
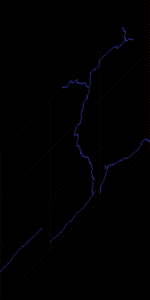
The figure shows an example of a romb and rombs surrounding it with the rivers placement.
*Other objects can be craters, crevices, etc. Currently they are not implemented.

